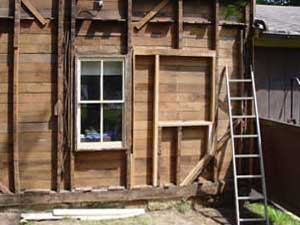
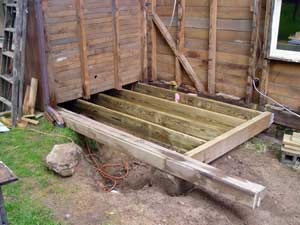
17 June: The original window in the music room is in the way of the new addition so it will be removed. Framing for the new window is in place. 27 June: The sill and floor joists for the addition are now in place.
2 July: The old window has been removed and boarded up and a new opening has been cut out and covered with plastic. 6 July: Polystyrene insulation has been installed, 3.5" thick to replace the half-inch that was there before. We pushed it up behind the second-floor siding as much as possible, into an area that was previously uninsulated.
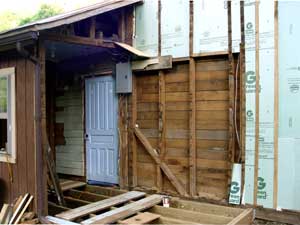

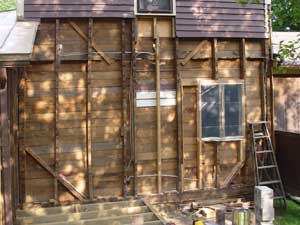
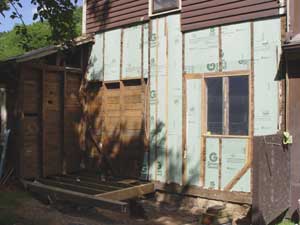
We have now taken out the south wall of the old bathroom. This is a change from the original plan, which left this wall in place, but Char decided that more space was needed for the laundry room. 13 July: House wrap has been added and the new window installed.
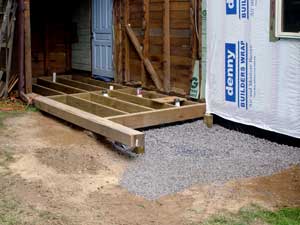

14 July: Drain pipe for all of the appliances is now in place. The bed of crushed stone fills a plastic-lined catchment basin for the outdoor shower. A platform will be built over it after the addition is closed in. 25 July: Water pipe is in place as well as insulation for the floor. With R-20 under the pipes, freezing should no longer be a concern.
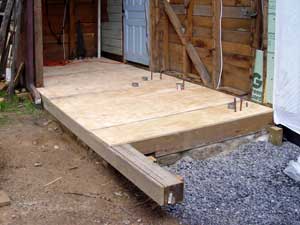
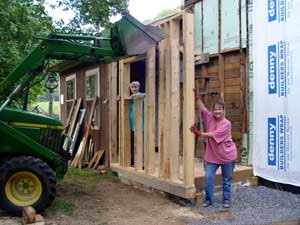
27 July: The plywood sub-floor is in place. 28 July: The west wall of the addition was raised by John Deere with the assistance of Char and our neighbor, Pat Wilson, at right.

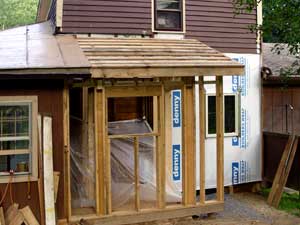
1 August: The much-smaller south wall was raised by hand with the able assistance of Shane Wiseman. Shane has been working for us all summer and has had a hand in several parts of this project. He has also kept the lawns mowed, helped with hay making, painted the barn roof, and done other chores too numerous to mention. 6 August: The rafters went up this morning and the roof deck is now in place. It has seemed a long time in coming but we are getting close to being closed in.
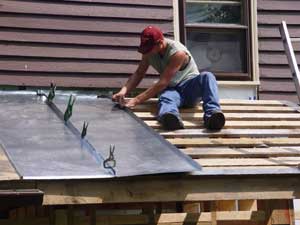
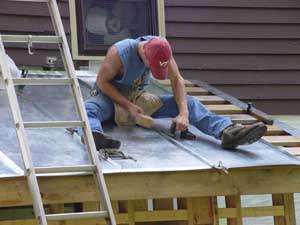
7 August: Shane nailing cleats on the second strip of metal roof [left] and making the second fold of the seam [right] on the next-to-last strip the next morning.
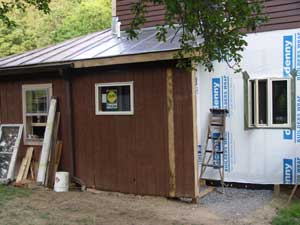
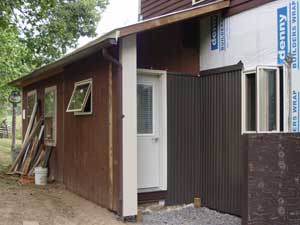
14 August: The bathroom window and siding have been installed. We are reusing the T-111 siding removed at the start of this project, hence the somewhat weathered look. 19 August: Closed in at last! The new door has been hung and the metal siding for the outdoor shower installed. Shane is starting back to school, so we will have his assistance much less often, and I have some other things to attend to, so there will be a short break on this project.
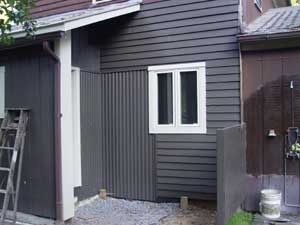

25 September: It has been over a month since our last update. Things have been happening but not much that shows up well in photos until the last few days. Today I finished all of the exterior except the porch for the shower. The original chestnut clapboard siding has been reinstalled on the house and sanded and painted, the trim is all painted, and the soffit installed. The past month has seen the rough wiring and insulation go in but the interior is hard to photograph so I have’t tried. Shane’s father is doing the drywall work for us and this is well underway. 26 September: And now the porch is finished. The drywall is also hung with taping and finishing scheduled to start tomorrow. The color of the siding is more accurate in the photo at right. Somehow the lighting has caused it to look gray in the left photo, which was taken later in the day.
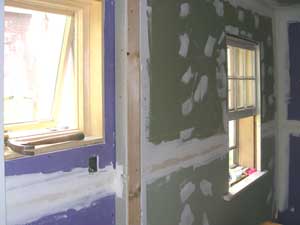
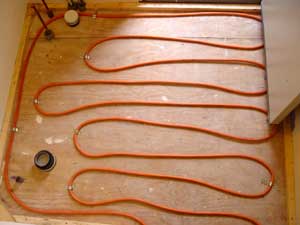
28 September: Rusty has been working away at the drywall in his spare time. We are using a moisture-resistant type commonly called “greenboard” but it turns out one supplier now makes it purple, so we have a mixture! This shows the bathroom window in the foreground and the laundry room beyond. 12 October: Once the drywall was in and primer painted, I began work on the floor. The first step was to lay out the tubing for radiant heat, shown here in the bathroom, looking toward the outside door.
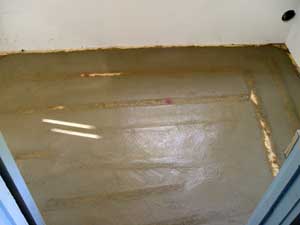
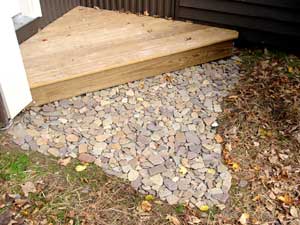
13 October: After the tubing was laid, 1.5" spacers were placed and concrete poured and leveled to provide a heat reservoir and serve as the base for the finished floor, in this case tile. This is the laundry room, looking in from the old part of the house. 18 October: Back outdoors, we collected stream pebbles from Back Creek and Char laid out this striking patio next to the shower. This covers up the crushed-stone catchment basin for the shower runoff, pictured back in July.
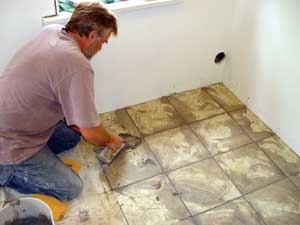

27 October: Art Applegate grouting the tile in our laundry room and doing the final polishing in our bathroom. The hole in the corner of the laundry room wall is for the dryer vent.
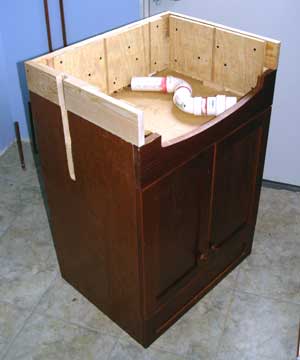
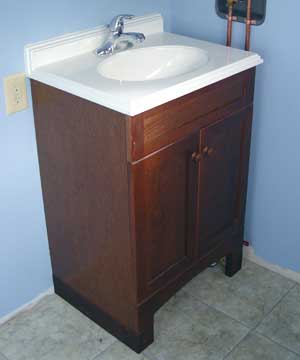
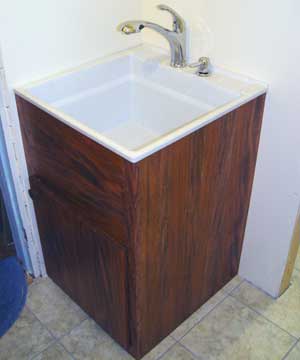
14 November: I am raising the counter level in the bathroom so I don’t have to bend over to wash up. This is our cheap sink cabinet from Lowe’s, standing upside down, having a 3.5" band added around the bottom. 16 November: And here it is installed. The pipes at right lead to the outdoor shower. They are on the inside of the wall to protect them from freezing.
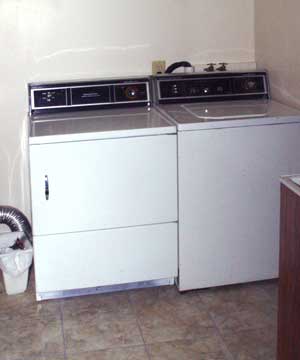
17 November: The laundry sink is now installed. It is supported by a custom cabinet, built by Byron Adams, in place of the short plastic legs that came with it. It is the same height as the bathroom sink. 23 November: At last, the washer and dryer are in place and functional. Char is ecstatic to be using her new laundry room and I am enjoying my new shower. We have also completed the insulation of all the plumbing except that which is under the kitchen floor.
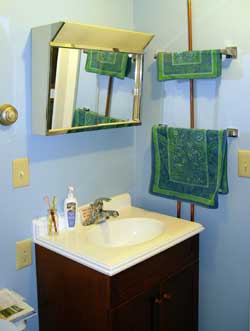
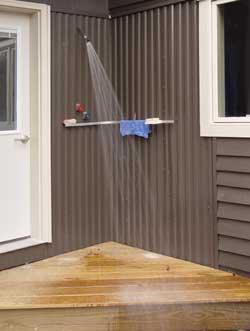
26 November: We now have a medicine cabinet and some towel racks in the new bathroom. We still need one more towel rack and some shelves in both rooms. And here is my shower in action. The valves have long stems, which reach clear through the wall, so the pipes are all on the inside, visible under the towels in the left photo. The pipe to the shower head slopes downward so the water drains out when it is turned off, all the way back through the wall so no water is exposed to freezing.
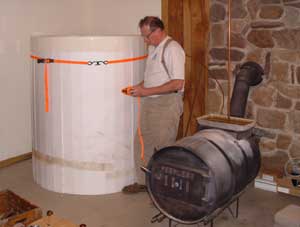
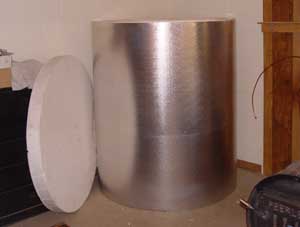
12 December: Ken Schaal is assembling the 325-gallon storage tank for our solar hot water system. The tank is made up of strips of polystyrene foam with a vinyl liner, held together by an aluminum band around the outside, secured with many screws. The water will be heated by solar collectors, to be installed on the roof, and by a heat exchanger to be installed on the wood stove. Water in the tank will be used for radiant heat in the floor of our new bathroom and laundry room as well as the new kitchen and dining room, which is next year’s project. A 35-gallon stainless-steel tank will be placed inside the large tank to provide domestic hot water.
With the holidays coming up, this is as far as we will get this year. The story continues when we get back to work after the New Year.